今回はスプライン曲線を描く方法について紹介します。
スプライン曲線を描く
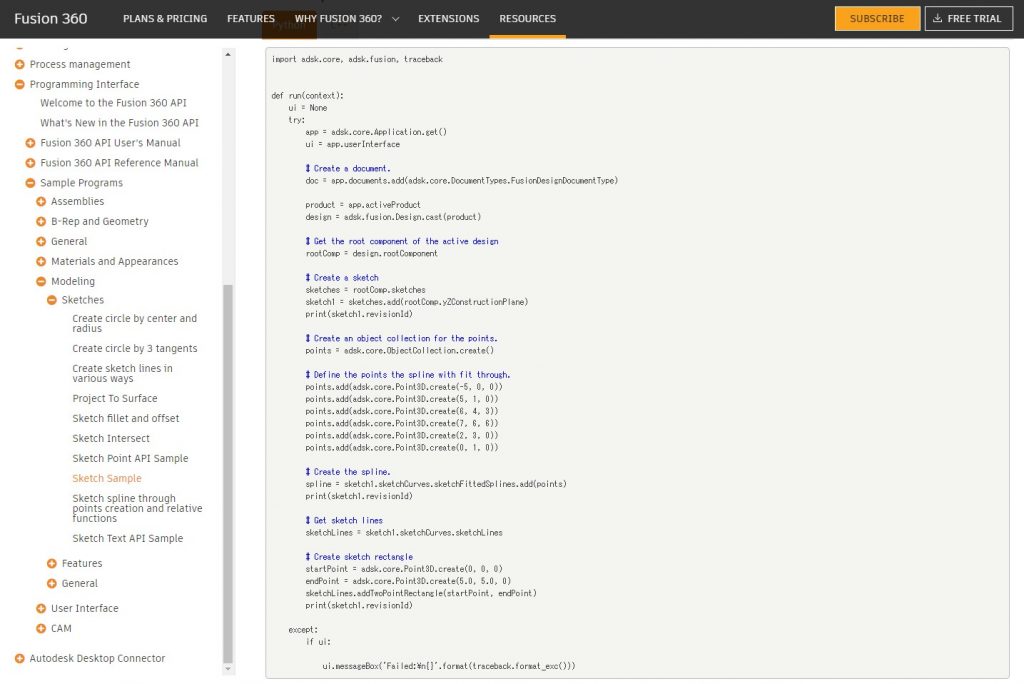
Fusion360のドキュメントにサンプルコードにスプライン曲線を描く方法が記載されています。

import adsk.core, adsk.fusion, traceback


def run(context):
    ui = None
    try:
        app = adsk.core.Application.get()
        ui = app.userInterface

        # Create a document.
        doc = app.documents.add(adsk.core.DocumentTypes.FusionDesignDocumentType)

        product = app.activeProduct
        design = adsk.fusion.Design.cast(product)

        # Get the root component of the active design
        rootComp = design.rootComponent

        # Create a sketch
        sketches = rootComp.sketches
        sketch1 = sketches.add(rootComp.yZConstructionPlane)
        print(sketch1.revisionId)

        # Create an object collection for the points.
        points = adsk.core.ObjectCollection.create()

        # Define the points the spline with fit through.
        points.add(adsk.core.Point3D.create(-5, 0, 0))
        points.add(adsk.core.Point3D.create(5, 1, 0))
        points.add(adsk.core.Point3D.create(6, 4, 3))
        points.add(adsk.core.Point3D.create(7, 6, 6))
        points.add(adsk.core.Point3D.create(2, 3, 0))
        points.add(adsk.core.Point3D.create(0, 1, 0))

        # Create the spline.
        spline = sketch1.sketchCurves.sketchFittedSplines.add(points)
        print(sketch1.revisionId)

        # Get sketch lines
        sketchLines = sketch1.sketchCurves.sketchLines

        # Create sketch rectangle
        startPoint = adsk.core.Point3D.create(0, 0, 0)
        endPoint = adsk.core.Point3D.create(5.0, 5.0, 0)
        sketchLines.addTwoPointRectangle(startPoint, endPoint)
        print(sketch1.revisionId)

    except:
        if ui:

            ui.messageBox('Failed:\n{}'.format(traceback.format_exc()))
実行結果の確認
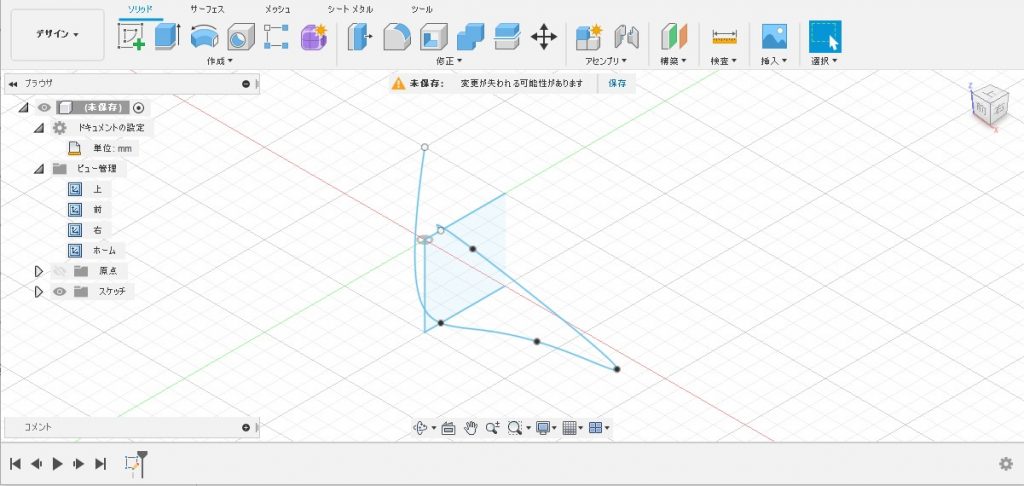
書かれているコードのままPythonスクリプトを作り、実行してみましょう。

プログラムの詳細
プログラムの中身を見ながらどんな事をしているのか確認していきます。
おまじない
1行目~11行目と48行目以降はスケッチのデザイン定番のおまじないです。
import adsk.core, adsk.fusion, traceback

def run(context):
    ui = None
    try:
        app = adsk.core.Application.get()
        ui = app.userInterface

        # Create a document.
        doc = app.documents.add(adsk.core.DocumentTypes.FusionDesignDocumentType)
…
    except:
        if ui:

            ui.messageBox('Failed:\n{}'.format(traceback.format_exc()))
デザインを取得する
13行目~14行目ではデザインを取得します。
        product = app.activeProduct
        design = adsk.fusion.Design.cast(product)
タイトルで「デザインを取得する」と書きましたが正直よくわかっていないです。
今までの紹介では以下の方法でデザインを取得していました。
        app = adsk.core.Application.get()
        design = app.activeProduct
今回と今までの違いとしては「activeProduct」で取得した要素をそのままデザインとするかデザインにキャストしているかの違いです。
なんとなく丁寧なのがキャストする今回の方法で横着して書いているのが「activeProduct」を直接使っている今までなのではないでしょうか。
Pytyon(もしかしたらFusion 360のサンプルだけかもしれないですが)は変数の型が定義しないまま使うので実際どんなオブジェクトが入っているか不明です。
ちなみに「activeProduct」の戻り値がどんな型か不明だったのでドキュメントで検索したのですが見つからないためどんな型のオブジェクトが取得できるか不明のままです。(わかったら追記しようと思います)
ルートコンポーネントを取得する
16行目~17行目ではルートコンポーネントを取得します。
        # Get the root component of the active design
        rootComp = design.rootComponent
17行目の「rootComponent」はルートコンポーネントを取得します。
スケッチを作る
19行目~22行目ではYZ平面上に新しいスケッチを作ります。(詳細は省略します)
        # Create a sketch
        sketches = rootComp.sketches
        sketch1 = sketches.add(rootComp.yZConstructionPlane)
        print(sketch1.revisionId)
22行目の「revisionId」はスケッチのリビジョンIDを取得します。
ドキュメントの「Sketch.revisionId Property」には同じスケッチでも何らかの変更が加えられたタイミングでリビジョンIDが変更されるため、このIDを比較する事で変化の有無を知る事ができると書かれています。
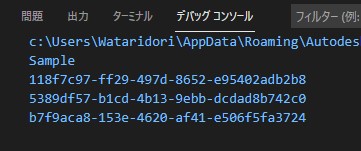
「print()」の結果はvscodeのデバッグコンソールで確認できます。

コレクションを作る
24行目~25行目では点要素を複数保持するためのコレクションを作ります。
        # Create an object collection for the points.
        points = adsk.core.ObjectCollection.create()
25行目の「adsk.core.ObjectCollection.create()」でコレクションを作成します。
このコレクションに保持する点要素はスプライン曲線を作るための点として使います。
点要素を作る
27行目~33行目では点要素を作ります。(詳細は省略します)
        # Define the points the spline with fit through.
        points.add(adsk.core.Point3D.create(-5, 0, 0))
        points.add(adsk.core.Point3D.create(5, 1, 0))
        points.add(adsk.core.Point3D.create(6, 4, 3))
        points.add(adsk.core.Point3D.create(7, 6, 6))
        points.add(adsk.core.Point3D.create(2, 3, 0))
        points.add(adsk.core.Point3D.create(0, 1, 0))
28行目~33行目の「add」で作成したコレクションに点要素を作りながら格納します。
スプライン曲線を作る
35行目~37行目ではコレクションの点要素を使ってスプライン曲線を作ります。
        # Create the spline.
        spline = sketch1.sketchCurves.sketchFittedSplines.add(points)
        print(sketch1.revisionId)
36行目の「sketchFittedSplines」でスプライン曲線を作り、「add()」で引数のコレクションスプライン曲線に追加します。(引数に点要素のコレクションを指定します)
線群を取得する
39行目~40行目では線群を取得します。(詳細は省略します)
        # Get sketch lines
        sketchLines = sketch1.sketchCurves.sketchLines
長方形を作る
39行目~46行目では長方形を作成します。(詳細は省略します)
        # Get sketch lines
        sketchLines = sketch1.sketchCurves.sketchLines

        # Create sketch rectangle
        startPoint = adsk.core.Point3D.create(0, 0, 0)
        endPoint = adsk.core.Point3D.create(5.0, 5.0, 0)
        sketchLines.addTwoPointRectangle(startPoint, endPoint)
print(sketch1.revisionId)長方形の作成は「Fusion360 Pythonスクリプトでスケッチに様々な方法で長方形を描く」にて詳しく紹介しているので参照してください。
まとめ
という事でスプライン曲線(それと最後におまけの長方形)の作成方法について紹介しました。
実際に動かしてみて確認したところふと疑問が出てきました。
スプライン曲線を構成する各点座標が実際作られた点座標とズレています。(スプライン曲線だけでなく最後に作成した長方形もズレています)
この原因はどうやらスケッチの作成時で、今回のスケッチ作成にはYZ平面を作っているためこの現象が起きているっぽい事が確認できました。
        # Create a sketch
        sketches = rootComp.sketches
#        sketch1 = sketches.add(rootComp.yZConstructionPlane)
        sketch1 = sketches.add(rootComp.xYConstructionPlane)
        print(sketch1.revisionId)
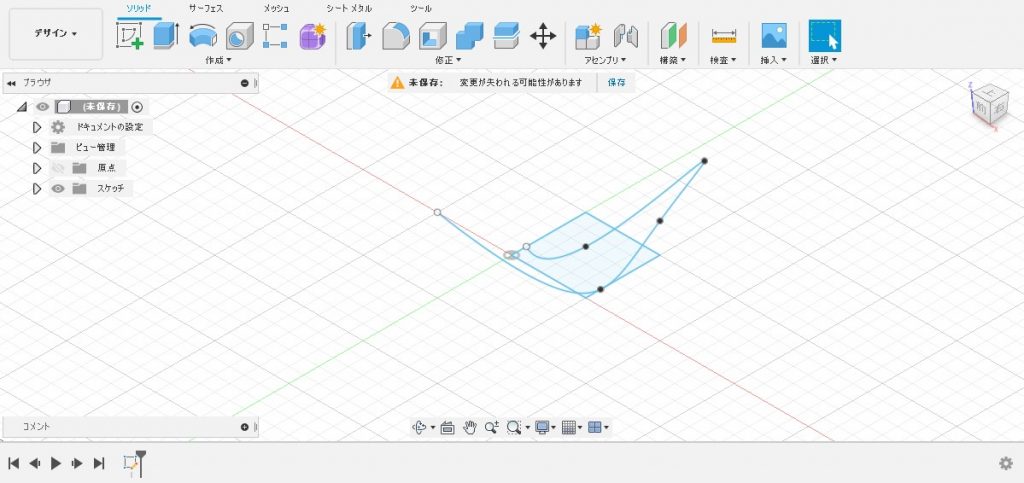
スケッチをYZ平面ではなくXY平面にしたところ今度は正しい座標に作成されました。(長方形の正しい座標になっていました)

この事からおそらくスケッチにはローカル座標系が存在し、そこで作成された要素はグローバル座標へ座標変換されているのでは?と思いました。
そのうちここら辺について調査しようと思うのでその結果をまた紹介しようと思います。


コメント