前回記事まで円を描く方法について紹介しました。
今回もスケッチで様々な方法で長方形を描く方法について紹介します。
様々な方法で長方形を描く
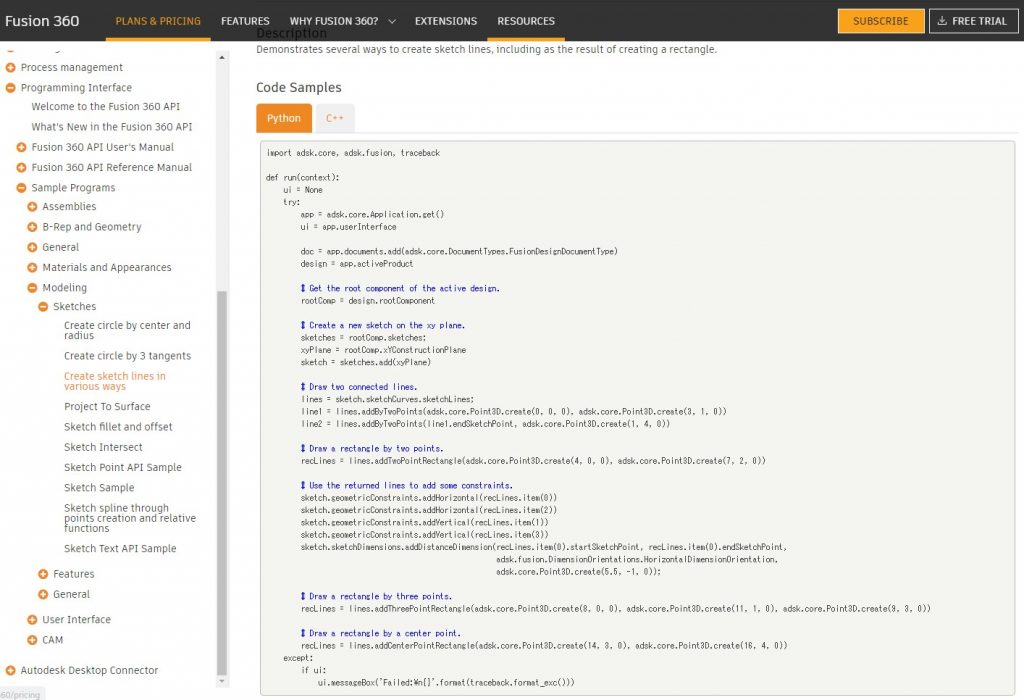
Fusion360のドキュメントにサンプルコードに様々な方法で長方形を描く方法が記載されています。

import adsk.core, adsk.fusion, traceback

def run(context):
    ui = None
    try:
        app = adsk.core.Application.get()
        ui = app.userInterface

        doc = app.documents.add(adsk.core.DocumentTypes.FusionDesignDocumentType)
        design = app.activeProduct

        # Get the root component of the active design.
        rootComp = design.rootComponent

        # Create a new sketch on the xy plane.
        sketches = rootComp.sketches;
        xyPlane = rootComp.xYConstructionPlane
        sketch = sketches.add(xyPlane)

        # Draw two connected lines.
        lines = sketch.sketchCurves.sketchLines;
        line1 = lines.addByTwoPoints(adsk.core.Point3D.create(0, 0, 0), adsk.core.Point3D.create(3, 1, 0))
        line2 = lines.addByTwoPoints(line1.endSketchPoint, adsk.core.Point3D.create(1, 4, 0))

        # Draw a rectangle by two points.
        recLines = lines.addTwoPointRectangle(adsk.core.Point3D.create(4, 0, 0), adsk.core.Point3D.create(7, 2, 0))

        # Use the returned lines to add some constraints.
        sketch.geometricConstraints.addHorizontal(recLines.item(0))
        sketch.geometricConstraints.addHorizontal(recLines.item(2))
        sketch.geometricConstraints.addVertical(recLines.item(1))
        sketch.geometricConstraints.addVertical(recLines.item(3))
        sketch.sketchDimensions.addDistanceDimension(recLines.item(0).startSketchPoint, recLines.item(0).endSketchPoint,
                                                     adsk.fusion.DimensionOrientations.HorizontalDimensionOrientation,
                                                     adsk.core.Point3D.create(5.5, -1, 0));

        # Draw a rectangle by three points.
        recLines = lines.addThreePointRectangle(adsk.core.Point3D.create(8, 0, 0), adsk.core.Point3D.create(11, 1, 0), adsk.core.Point3D.create(9, 3, 0))

        # Draw a rectangle by a center point.
        recLines = lines.addCenterPointRectangle(adsk.core.Point3D.create(14, 3, 0), adsk.core.Point3D.create(16, 4, 0))
    except:
        if ui:
            ui.messageBox('Failed:\n{}'.format(traceback.format_exc()))
実行結果の確認
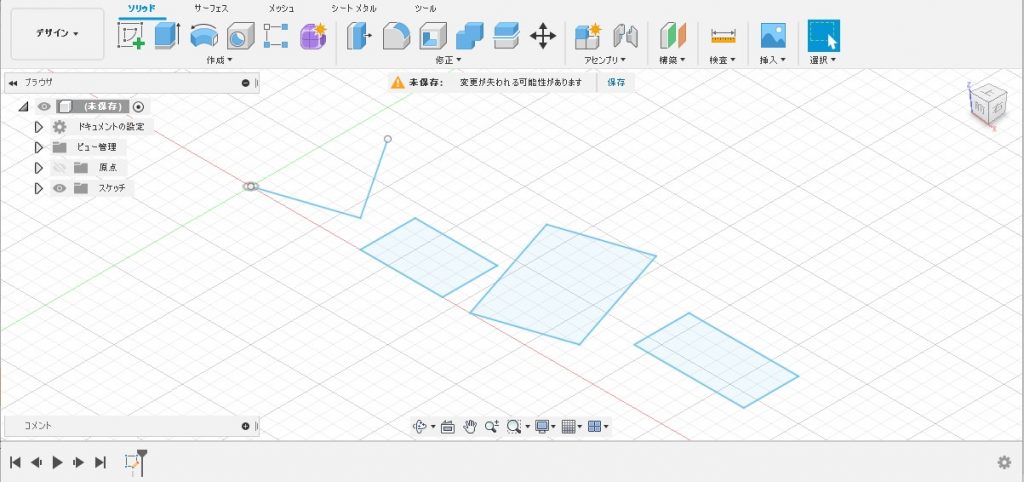
書かれているコードのままPythonスクリプトを作り、実行してみましょう。

プログラムの詳細
プログラムの中身を見ながらどんな事をしているのか確認していきます。
おまじない
1行目~10行目と42行目以降はスケッチのデザイン定番のおまじないです。
import adsk.core, adsk.fusion, traceback

def run(context):
    ui = None
    try:
        app = adsk.core.Application.get()
        ui = app.userInterface

        doc = app.documents.add(adsk.core.DocumentTypes.FusionDesignDocumentType)
        design = app.activeProduct
…
    except:
        if ui:
            ui.messageBox('Failed:\n{}'.format(traceback.format_exc()))
スケッチを作る
12行目~18行目ではXY平面上に新しいスケッチを作ります。(詳細は前回記事にて行っているので省略します)
        # Get the root component of the active design.
        rootComp = design.rootComponent

        # Create a new sketch on the xy plane.
        sketches = rootComp.sketches;
        xyPlane = rootComp.xYConstructionPlane
        sketch = sketches.add(xyPlane)
2つの直線を描いてつなげる
20行目~23行目では2つの直線を描いてつなげます。
        # Draw two connected lines.
        lines = sketch.sketchCurves.sketchLines;
        line1 = lines.addByTwoPoints(adsk.core.Point3D.create(0, 0, 0), adsk.core.Point3D.create(3, 1, 0))
        line2 = lines.addByTwoPoints(line1.endSketchPoint, adsk.core.Point3D.create(1, 4, 0))
21行目の「sketchCurves」で曲線群、「sketchLines」で直線群を取得します。
22行目の「addByTwoPoints()」で直線を作成します。(第一引数に始点要素、第二引数に終点要素を指定します)
23行目の「addByTwoPoints()」も直線を作成するのですが始点要素を1つ目の直線の終点要素(endSketchPoint)として指定しているため、2つ目の直線は1つ目の直線につなげて描いています。
対角の2点で長方形を描く
24、25行目では対角の2点で長方形を描きます。
        # Draw a rectangle by two points.
        recLines = lines.addTwoPointRectangle(adsk.core.Point3D.create(4, 0, 0), adsk.core.Point3D.create(7, 2, 0))
25行目の「addTwoPointRectangle()」で対角の2点から成る長方形を作成します。(第一引数、第二引数に点要素を指定します)
拘束と寸法を追加する
28~35行目では拘束と寸法を追加します。
        # Use the returned lines to add some constraints.
        sketch.geometricConstraints.addHorizontal(recLines.item(0))
        sketch.geometricConstraints.addHorizontal(recLines.item(2))
        sketch.geometricConstraints.addVertical(recLines.item(1))
        sketch.geometricConstraints.addVertical(recLines.item(3))
        sketch.sketchDimensions.addDistanceDimension(recLines.item(0).startSketchPoint, recLines.item(0).endSketchPoint,
                                                     adsk.fusion.DimensionOrientations.HorizontalDimensionOrientation,
                                                     adsk.core.Point3D.create(5.5, -1, 0));
29行目~32行目の「geometricConstraints」は拘束群です。
29、30行目の「addHorizontal()」で水平拘束、31、32行目の「addVertial()」で垂直拘束を追加します。(引数に線要素を指定します)
33行目~35行目の「sketchDimensions」は寸法群、「addDistanceDimension()」で寸法を追加します。(第一引数、第二引数に寸法を付ける点要素、第三引数に寸法の方向、第四引数に寸法を配置する点要素をそれぞれ指定します)
一辺と高さで長方形を描く
37、38行目では一辺と高さで長方形を描きます。
        # Draw a rectangle by three points.
        recLines = lines.addThreePointRectangle(adsk.core.Point3D.create(8, 0, 0), adsk.core.Point3D.create(11, 1, 0), adsk.core.Point3D.create(9, 3, 0))
38行目の「addThreePointRectangle()」で一辺と高さから成る長方形を作成します。(第一引数に一辺の始点要素、第二引数に一辺の終点要素、第三引数に高さとなる点要素を指定します)
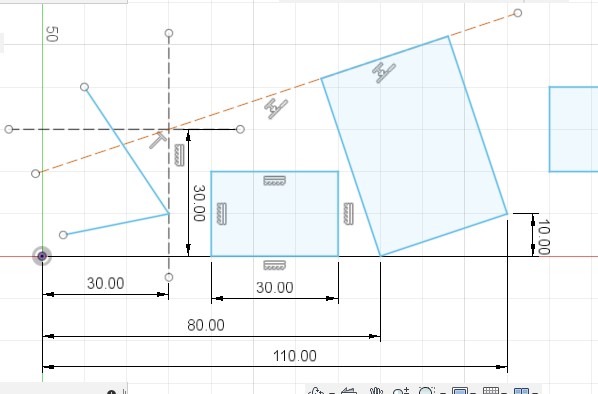
イメージが湧きづらい内容だと思うので補足します。

今回のサンプルでは一辺の始点が(11,0)、終点が(11,1)、高さが(3,3)となっているので上図のように高さの辺の延長線上に第三引数に指定している点(3,3)と一致します。
中心点と角の点で長方形を描く
40、41行目では中心点と角の点で長方形を描きます。
        # Draw a rectangle by a center point.
        recLines = lines.addCenterPointRectangle(adsk.core.Point3D.create(14, 3, 0), adsk.core.Point3D.create(16, 4, 0))
41行目の「addCenterPointRectangle()」で中心点と角の点から成る長方形を作成します。(第一引数に中心点要素、第二引数に角の点要素を指定します)
長方形は傾きの無い物が出来上がります。(傾きを設定する場所が無いので傾いた長方形を作る場合にはこれは使えないかも?)
まとめ
円に続き長方形を描く方法について紹介しました。
「一辺と高さで長方形を描く」方法以外で作成する長方形では傾きが出来ないように思えたのですが実際はどうでしょうか?
ここら辺はまだまだ勉強不足なので分かり次第追記したいと思います。
さて、次はどんなスクリプトを紹介できるでしょうか?


コメント